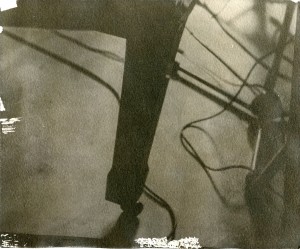
Salt-printing is a old process used by pioneer Henry Fox Talbot; responsible for the birth of photography. Its similar to cyanotypes, but it gives a brown hue instead of blue which give the image a more retro feel to it.
How to make a salt print
What you need:
– watercolour paper
– Sodium Chloride (salt)
– Silver Nitrate
– Purified Water
– Citric Acid
– Sodium Thiosulphate powder
– Bicarbonate of soda
– Protective gloves
– Rod or Brush
Making the salt print
1 / Create salt solution (1 litre cold tap water 20 grams of sodium chloride)
2 / Spread the solution over the watercolour paper with a nice clean coating on both sides
3 / Dry the sheet until its fully dry
4 / Put on the gloves and coat silver nitrate solution on one side and mark an ‘X’ on the other
5 / Ensure the paper is fully dry
6 / Place the object / negative on the side with silver nitrate solution
7 / Put glass on top to keep the image stable and slide it under a UV light for 15minutes or outside for around 4-8minutes
8 / Make the fix for the image (500ml water, 25 grams of sodium thiosulphate, 2 grams bicarbonate of soda)
9 / Put the image into the fix and leave it for 5 minutes
10 / Leave the image in the wash (water) for 30 minutes, then remove and dry
Once completed, you’ll have a finished traditional salt print.
I was incredibly happy with my salt print. When coating the solution onto the watercolour paper I ensured it was spread evenly across the whole sheet; I used a rod for this. I found that people who used the brushes ended up getting defined lines into the print that showed the solution had been added with the brush. The image itself was very clear and the colour was a nice shade of brown that gave the retro feel. Salt printing produces the most attractive aesthetic out of the alternative processes because of the colour and reminiscence of Talbots prints. Definitely a process I’d like to return to.
